
Loyalty
The loyalty card is the Apple/Google Wallet pass customers can add to their profile. It’s separate from physical cards: see Customer cards for linking cards themselves.
Changing the settings
- Open the Backoffice and click Loyalty.
- Adjust the settings and save with the green tick.
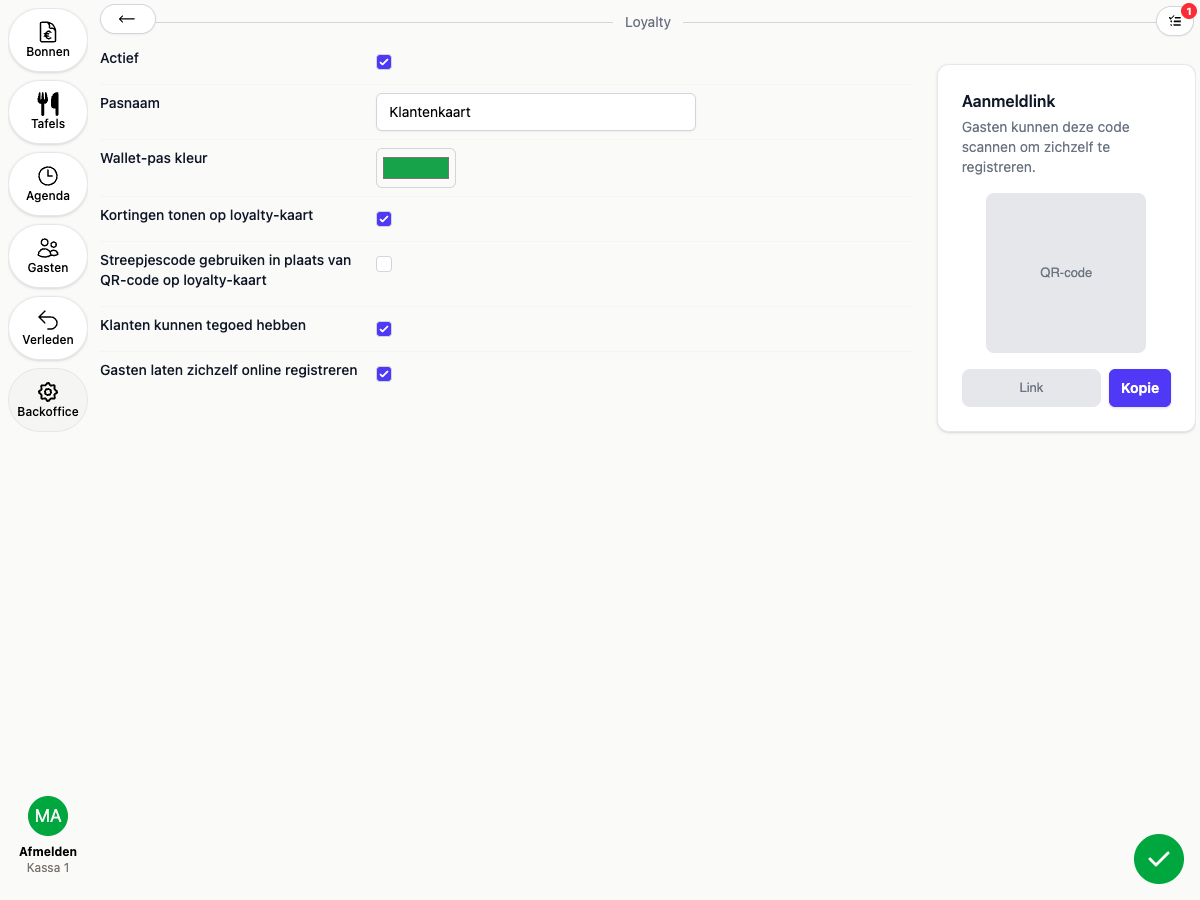
- Enabled: turns the loyalty card on or off. If it’s on, a QR code shows up on customer profiles and Apple/Google Wallet is available.
- Pass name: the name printed on the pass, for example “Loyalty card” or your venue’s name.
- Wallet pass color: the background color of the Apple/Google Wallet pass.
- Show discounts on loyalty card: shows the customer’s active discount rules on the pass itself.
- Use barcode instead of QR code on loyalty card: uses a barcode instead of a QR code as the scannable code on the pass.
Once Enabled is turned on, the loyalty card automatically shows up on every customer’s profile, and you can email the pass with Send loyalty mail from the action menu.
Letting guests register themselves
Turn on Allow guests to register themselves online (see the settings above) to let guests fill in their own name, email address and phone number, without your staff having to do it for them.
Once that’s on, a card with a QR code and a link to the sign-up page appears on the right of the Loyalty settings page. Have a guest scan the QR code, or share the link (for example with Copy, or Share if you’re using the Backoffice inside the 20Tabs app). The guest fills in their details and is automatically added as a guest.
Right after registering, the guest automatically receives an email with their loyalty card, including the buttons to add it to Apple or Google Wallet. You can customize that email under Backoffice → Email templates → Loyalty card, see Email templates.
Group registration links
Every group gets its own registration link. Guests who sign up through a group’s link or QR code are automatically added to that group, handy for a bachelor party or a company outing, for example.
- Make sure Allow guests to register themselves online is on in the Loyalty settings.
- Go to Customers > Groups and open the group you want.
- On the right of the page you’ll find that group’s registration link with QR code.
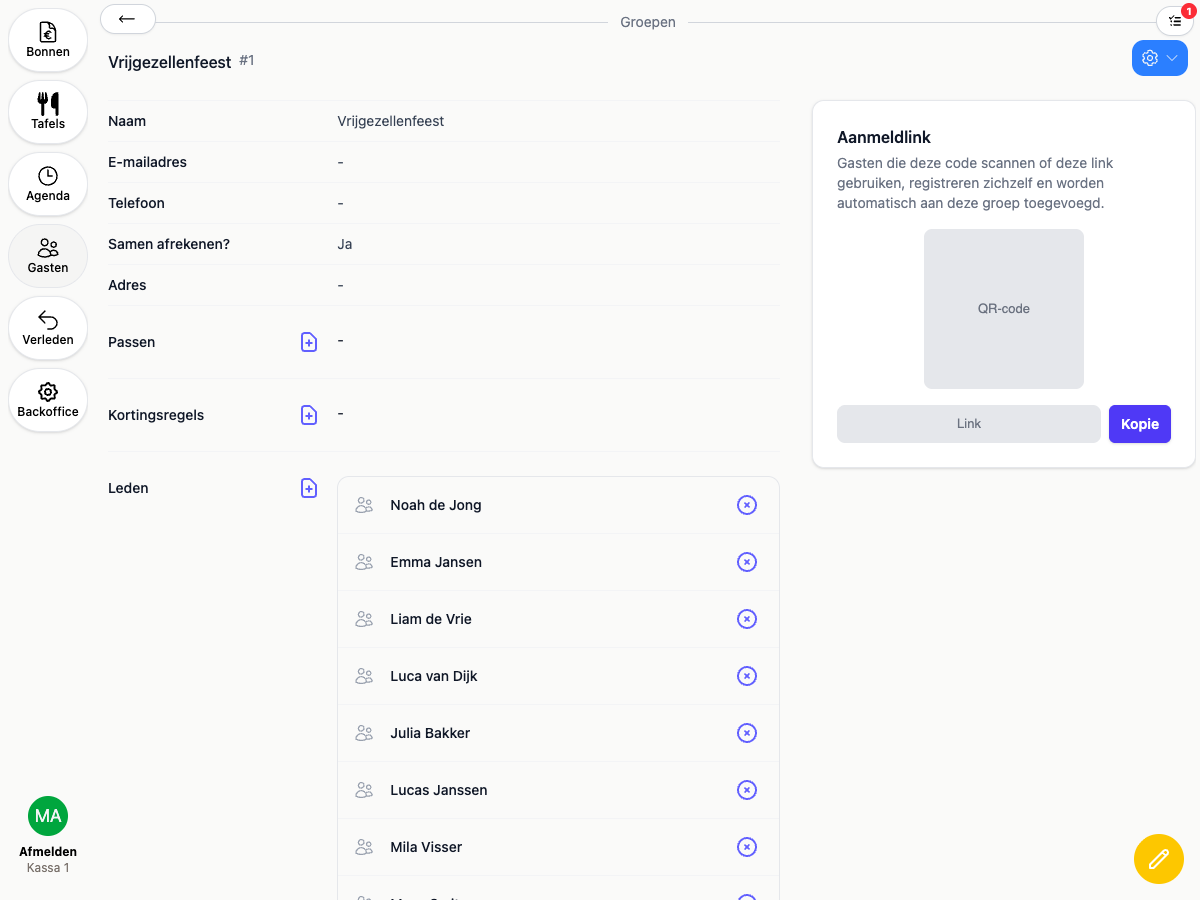
The guest sees which group they’re signing up for on the registration page, and automatically shows up under Members of that group once they’ve registered.
Adding a pass to Apple or Google Wallet
- Open the customer’s profile. If loyalty is enabled, you’ll see a card with a QR code in the top right.
- Have the customer scan that QR code with their own phone’s camera, or send it to them with Send loyalty mail from the action menu.
- The customer lands on a page with Add to Apple Wallet and Add to Google Wallet buttons.
- Once the pass is added, it automatically shows up under Cards on the customer’s profile. There’s nothing you need to link manually.